A month ago I was asked by Christine of
Hammerstitch Bags to test her newest pattern, the Aberdeen Tote. I love her Cambridge bag pattern so said yes right away and within 24 hours had a sample completed. I made notes as I read over the pattern before starting and then while piecing the bag. I made a few suggestions as pattern testing isn't just making the bag but helping make the pattern as clear and error free as possible. I really enjoyed getting a preview of the pattern and felt like I was returning a favour by testing for her. I have learned a lot from Christine when it comes to bag making as she shares great tips on her Instagram account and freely share where she buys her supplies.
So far I have made five of these totes and the first 2 were made with a light green and a brown waxed canvas. The exterior pocket is made with a cotton canvas called Autumn Breeze by Paintbrush Studio Fabrics that I purchased at
Needle Craft & Studio.
I lined it with a Dot print cream batik and added a zipper pocket which was not in the pattern as I have to have an interior zipper pocket in my bags.
The exterior has a zipper pocket on one side and an open pocket on the other. I cut all my own leather straps as I buy a half side of leather from OA Leather in SK. I purchase my zipper and zipper pulls from Zipper Valley in ON.
I made two of these totes and they both sold before I even posted them on my social media.
This next tote was made with a combination of a Grey and a Brown waxed canvas, and the pocket is a Rifle Paper Co. Canvas called Garden Party.
I lined this one with a grey Moonscape fabric by Dear Stella.
I also made two of these and both have sold.
Next is the fifth Aberdeen Tote and was made with an Olive green and a Brown waxed canvas. The exterior pocket is made using a cotton print called
Wild Cottage by Figo Fabrics.
I lined it with one of my favorite fabrics, Rifle Paper Co. Basic Menagerie.
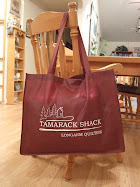
Again I added a zipper pocket to the inside lining and my signature Tamarack Shack cork label that Tim etched for me on his laser. His retirement purchase sure has come in handy for my bag making venture.
I have my first local market of the year this Saturday so hope to have a few more Aberdeen Totes finished to show in my booth. So if you are interested in bag making I highly recommend you check out
Hammerstitch Bags website. She also has hardware kits and leather strap kits, as well as has finished bags for sale!